Directory
 Download User Manual - TuneCable iTadal Music Converter
Part 1. How to Register TuneCable iTadal Music Converter?
Step 1. Click on the avatar icon in the lower left of the sidebar. Or click the top-right "Menu" button and choose "Register" in the drop-down list, and you will get the registration interface.
Step 2. After receiving your license, to avoid the 'invalid code' error, simply copy and paste the registration Email and Code into the registration dialog. Then click on the "Register" button.
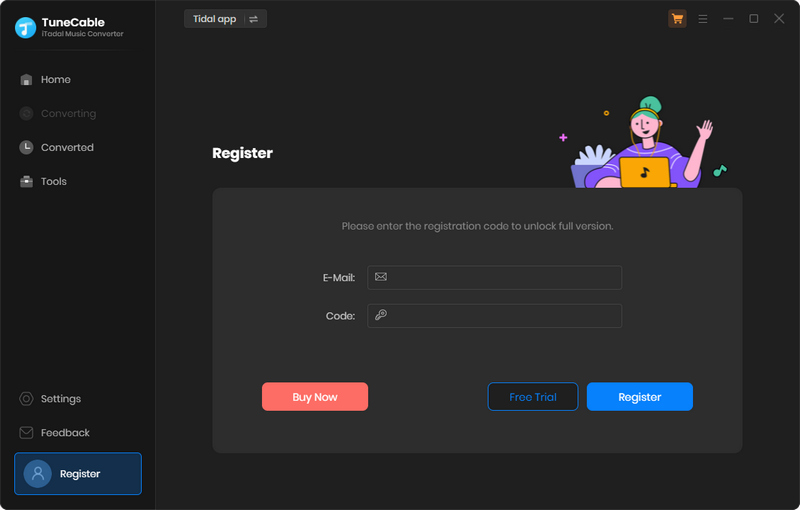
Note: The registration info is case-sensitive. Please do not add a blank at the beginning or the end of the word.
Part 2. How to Download Tidal Music to MP3, AAC, FLAC, WAV, AIFF, or ALAC with TuneCable?
TuneCable supports downloading from both the TIDAL app and the Tidal web player. The biggest differences lie in highest output quality and conversion speed. The app mode perserves up to Hi-Res quality at up to 5x the speed with the TIDAL app support, whereas the web player mode works by accessing the built-in Tidal web player and retains up to HiFi quality at up to 10x fast speed. Besides, the operation progresses are different, we will show them respectively. Follow our detailed steps to extract songs, albums, podcasts, and playlists from Tidal to a Windows PC or a Mac computer.
Step 1. Run TuneCable iTadal Music Converter on Windows
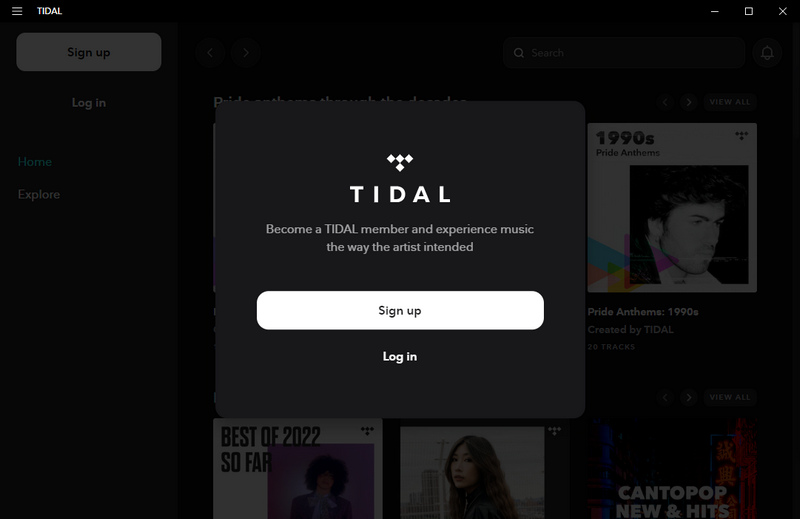
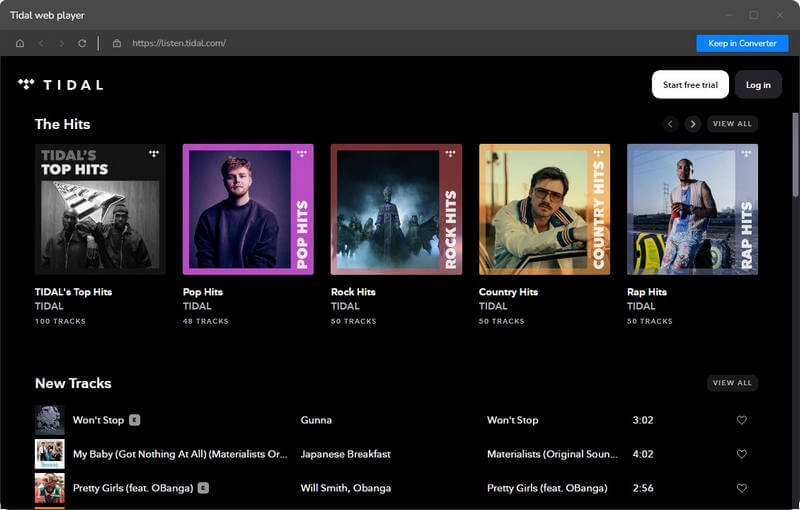
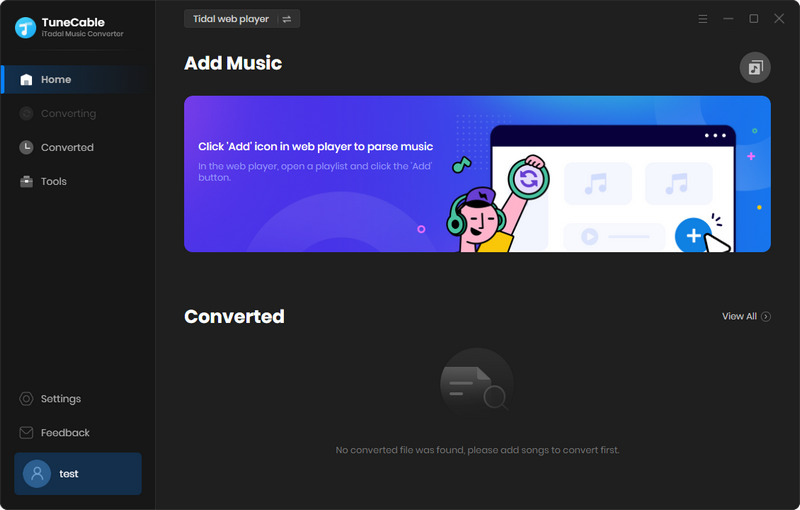
After the installation of the TuneCable iTadal Music Converter, open this program on your Windows or Mac. Go to the top navigation bar, you can select a download source, namely the "Tidal App" and "Tidal web player". The Tidal app or the built-in Tidal web player will open automatically. Follow the tips to log in to your Tidal account.
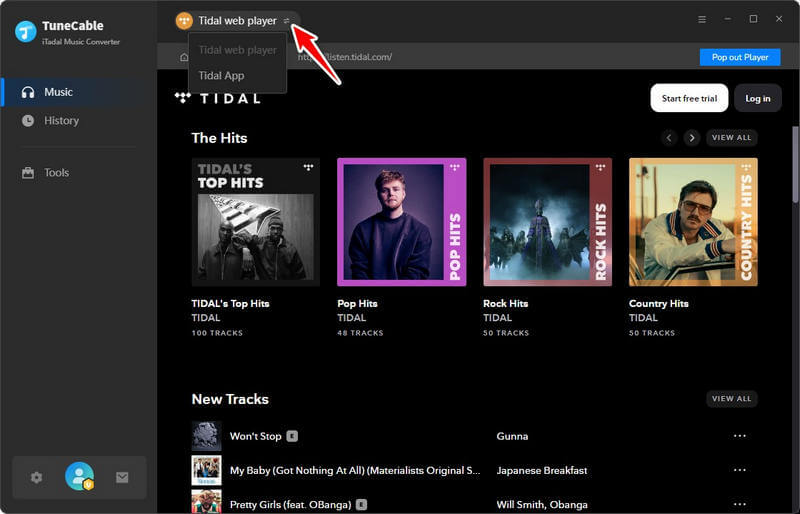
Tips: By clicking "Keep in Converter" or "Pop out Player", you can decide how the web player is located.
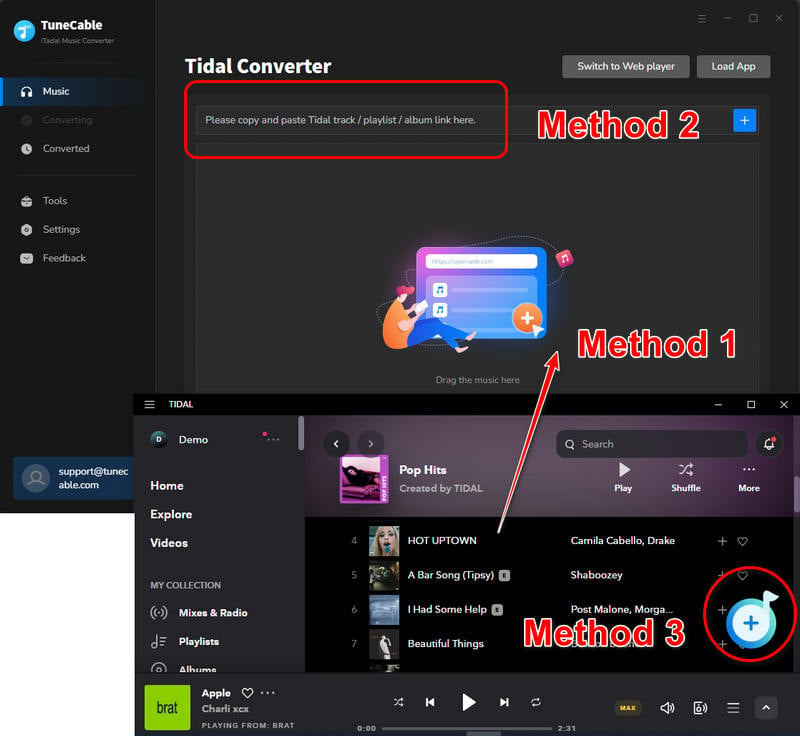
Step 2. Locate Desired Tidal Song / Album/ Playlist
Head to the Tidal app or web player and navigate to your preferred songs, playlists, albums, and podcasts. There are three options to add songs:
- Click and hold on to the title, drag and drop it to the free space on TuneCable. (Only available for downloading music from the Tidal app.)
- Copy and paste the link of a song, album, or playlist to the converter. (Only available for downloading music from the Tidal app.)
- Tap on the blue "Click to Add" button in the lower right.
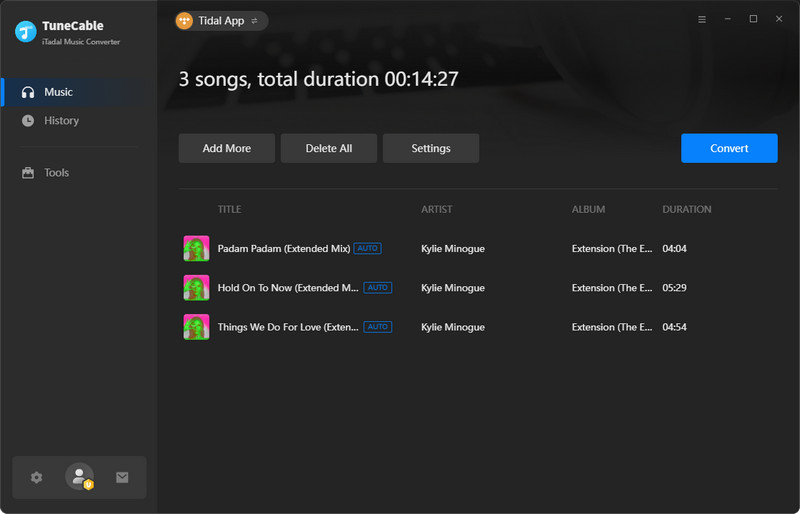
Step 3. Select Songs to Download
TuneCable will then read and load the songs on a popup, where you can pick specific songs. Next, hit "Add".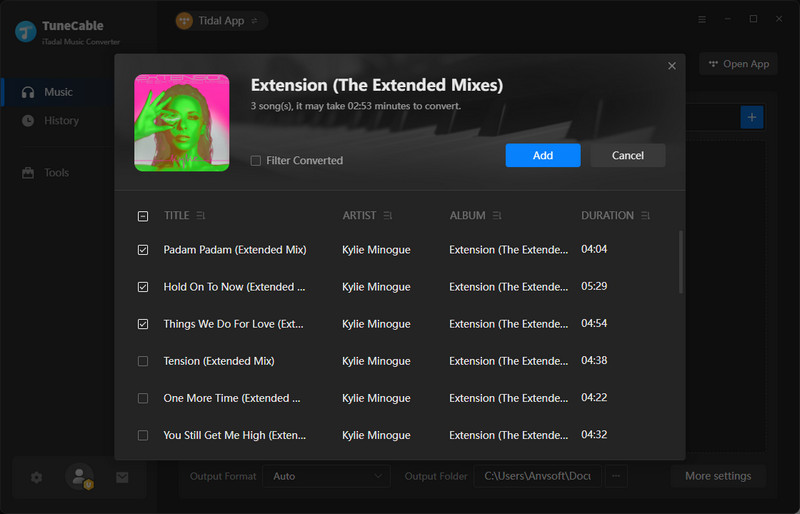
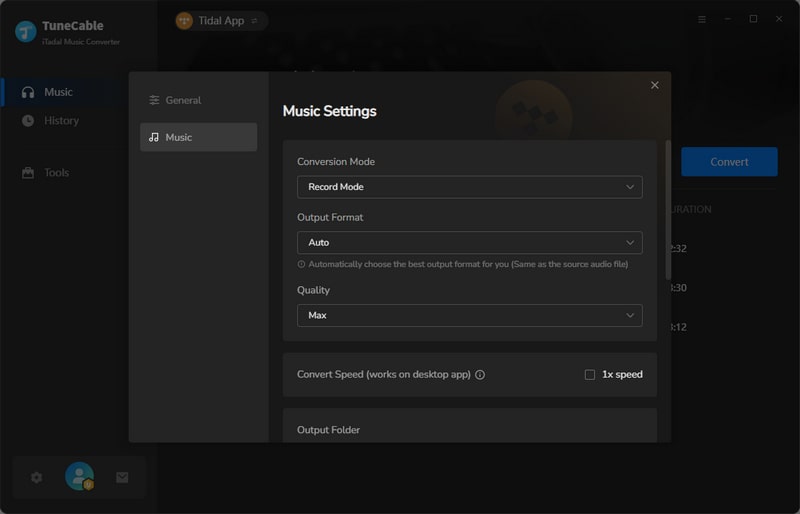
Step 4. Change Output Parameters on TuneCable
Head over to the lower left corner to select the "Settings" icon, where you are allowed to change the following setting options.
- Conversion Mode: Intelligent Mode, Record Mode, YouTube Mode
- Output Format: Recommended, MP3, AAC, WAV, AIFF, ALAC, FLAC
- Quality (Auto): Low, High, Max
- Bit Rate (MP3, AAC): 128kbps, 192kbps, 256kbps, 320kbps
- Bit Depth (WAV, AIFF, ALAC, FLAC): 16bit, 24bit
- Sample Rate: 44.1kHz, 48kHz, 96kHz, 192kHz
- Output Folder: To your preference
- Output File Name: Track Number, Title, Artist, Album, Playlist Index, Year
- Output Organized: None, Playlist, Artist, Album, Artist/Album, Album/Artist, Playlist/Artist, Playlist/Album
Tips:
1. When selecting "Record Mode" as the Conversion Mode, selecting "Auto" from Output Format, and selecting "Max" in the Quality section, TuneCable outputs Tidal music with the source format and sound quality.
2. To download music from Tidal app or web player, use Record Mode. If your network connection is unstable, switch to YouTube Mode to download the same song from YouTube. Intelligent Mode means TuneCable automatically switches between downloading music from Tidal app / web player or YouTube based on your network condition.
3. If you choose to download a playlist without changing the order of each track, access "Settings", under "Output File Name", retain only "Playlist Index" and "Title". Head to "Output Organized", select "Playlist".
Step 5. Start Converting Tidal Music
Click "Add More" and repeat the adding song steps if you want to add more songs. After all of the songs are added, start converting the added songs by clicking on "Convert".
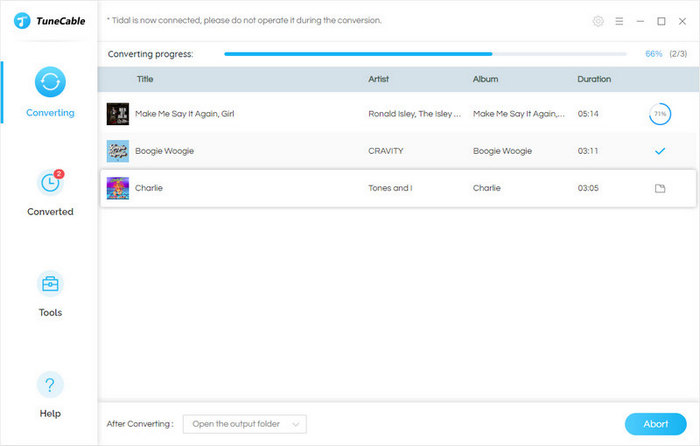
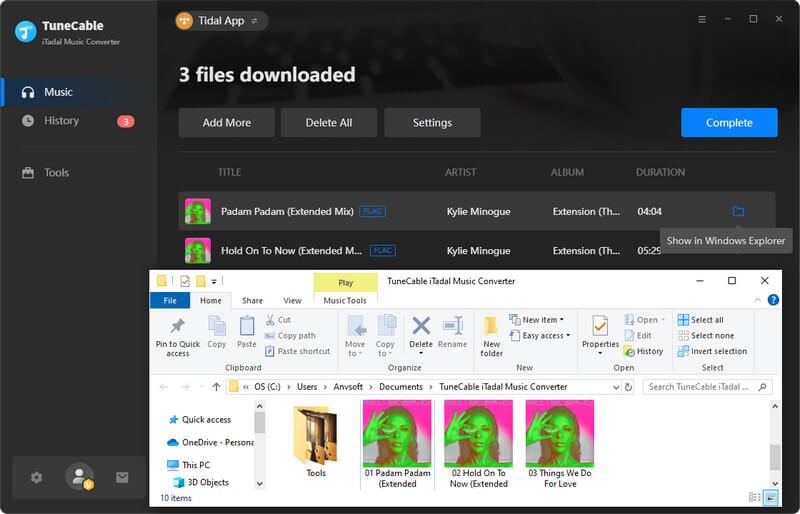
Step 6. Check Converted Tidal Music
Once the conversion is completed, click the "folder icon" to locate the song on the local computer. Also, you can head to the "History" column, check the downloaded Tidal songs and enjoy the free playback now.