

TuneCable Apple Music Converter
GarageBand, a versatile digital audio workstation (DAW) developed by Apple, has become an indispensable tool for music creation on macOS and iOS platforms. This powerful yet user-friendly application empowers both beginners and professional musicians to play instruments and create music with ease. GarageBand has a wide audience, due to its versatility and the fact that it comes pre-installed on Mac computers and iPhones. Music enthusiasts who use Mac computers or iPhones often use GarageBand to create music and bring their creative dreams to life.
In this comprehensive guide, we will guide you through the simple steps to add Apple Music to GarageBand on both Mac and iPhone, making sure you can create the perfect song using this musical duo. Whether you're looking to lay down a new beat or add a fresh melody, this guide will equip you with the knowledge to make your musical dreams a reality.
GarageBand is designed to accommodate a variety of audio formats such as AIFF, CAF, WAV, Apple Lossless, and MP3 format, but it does have limitations when adding Apple Music. GarageBand allows you to use the purchased music from iTunes, but if there are too many songs you want to mix with GarageBand, buying all of them is too pricey. You can also add Apple Music stored locally on your device to GarageBand.
However, unfortunately, you cannot import Apple Music songs directly into GarageBand because Apple Music employs Digital Rights Management (DRM) to protect its streaming content, which means that the songs you stream or download for offline listening are encoded in formats like AAC, M4P, and ALAC, which GarageBand cannot recognize.
Don’t worry. You can use some third-party programs to convert Apple Music to a format compatible with GarageBand. Once converted, these files can then be imported into GarageBand for your music projects.
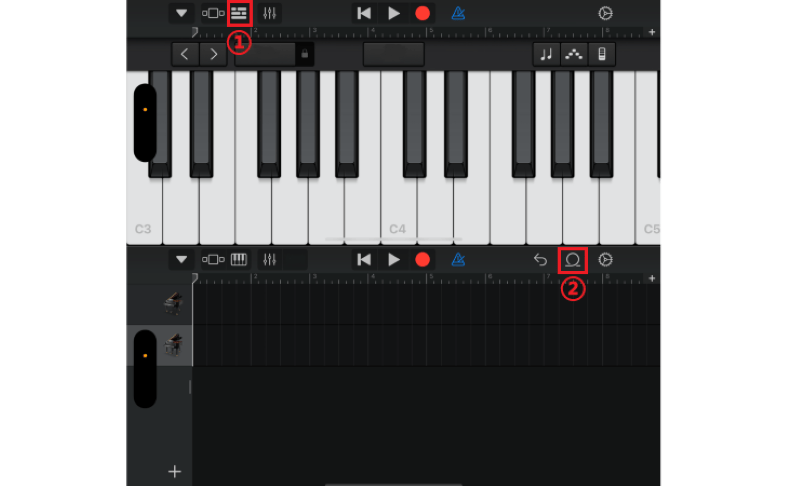
Step 1: Launch the GarageBand on your iPhone. Tap the "Tracks" icon on the upper left to get a list of tracks.
Step 2: Tap the "Loop Browser" button on the upper right, then tap Music. You can search for songs by name, or browse by album, artist, genre, or playlist.
Now, you can start to edit Apple Music with GarageBand and make your own music.
For Mac users, we will introduce a useful tool first, called TuneCable iMusic Converter. TuneCable iMusic Converter is an easy-to-use converter which helps you download Apple Music songs and albums onto local Mac in MP3, AAC, WAV, FLAC, AIFF & ALAC formats compatible with the formats which can be supported by GarageBand. Download TuneCable iMusic Converter first and see how to operate this program.
🔹 Record Apple Music and iTunes music/podcasts/audiobooks.
🔹 Convert Apple Music to MP3/AAC/WAV/FLAC/AIFF/ALAC.
🔹 Convert at 10X faster speed with lossless quality.
🔹 Keep ID3 tag information like title, artist, album, etc.
🔹 Activate permanent playback after the conversion.
🔹 Enable to transfer Apple Music tracks to any device for use.
Step 1: Launch TuneCable iMusic Converter
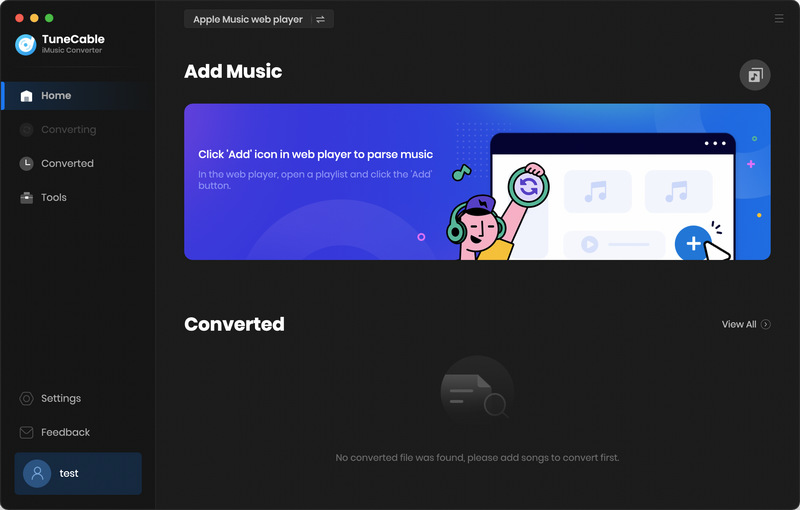
Launch TuneCable iMusic Converter on your Mac computer. You'll see the main interface below, allowing you to choose to record music from the Apple Music App and the Apple Music web player.
Step 2: Add Music
If the Apple Music App is installed on your Mac, recording music from the Apple Music app is applicable. Otherwise, you can download music from the built-in Apple Music web player. Tutorials for both methods of recording music are listed below.
1. Add Music from the Apple Music App
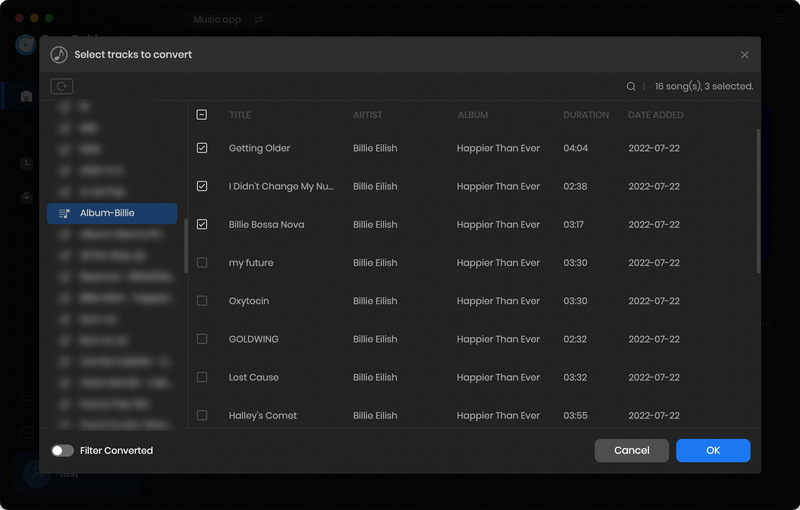
If you choose to record music from the app, click the "+Add" button and TuneCable will load your iTunes Library for you. Select the music you want and click "OK" to add the selected songs to the download list.
2. Add Music from the Apple Music Web Player
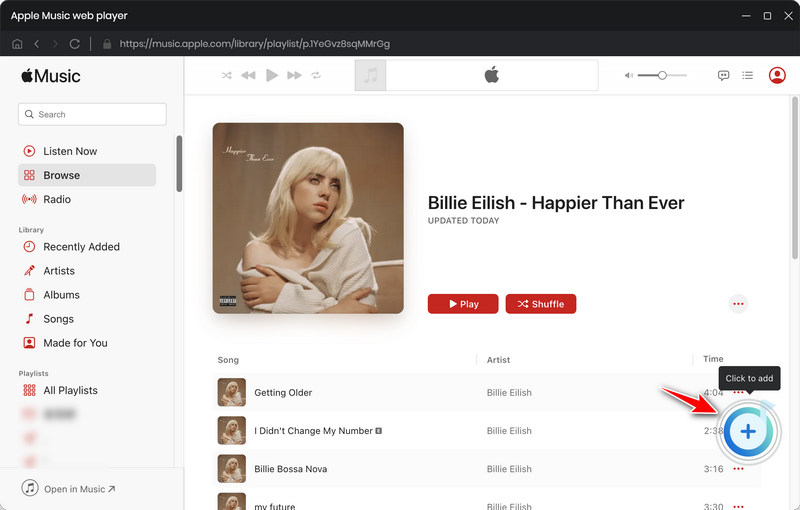
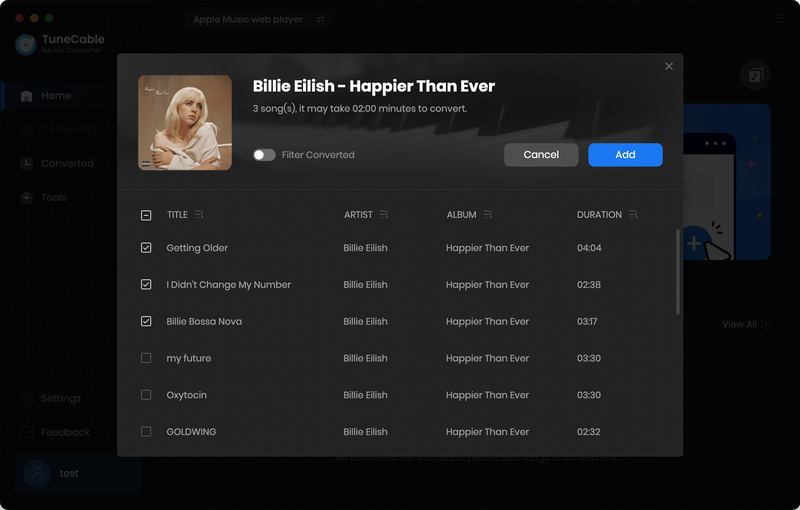
If you want to add music from the Apple Music Web Player, switch to Apple Music Web Player Convert Mode and the built-in Apple Music web player page will pop up. Log in to your Apple Music account, choose your albums and tap on the "Click to add" button. TuneCable will create a list of songs for you to select. Select the desired music tracks by ticking the corresponding boxes and clicking "Add".
Step 3: Change Settings
Before starting converting, you can change the output settings first. Click on the "Settings" on the left side. Here you can change the output format, the bit rate and the sample rate. The output quality varies according to the output format. If you select "Auto" as your output format, the songs will be downloaded from Apple Music in their original quality and format.

Step 4: Convert the Music
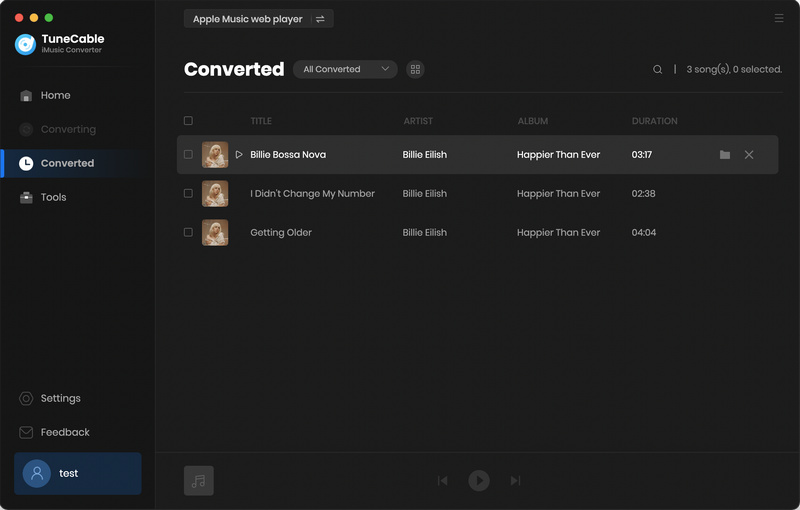
Are you ready to convert the music? After changing all the settings, go back to the "Music" in the left bar. Start the conversion by clicking on "Convert". If you want to add more songs or forget to add some songs, click "Add More" to help you. Wait for a short time and your music will be converted to the folder that you set before.

Step 5: Import Apple Music into GarageBand
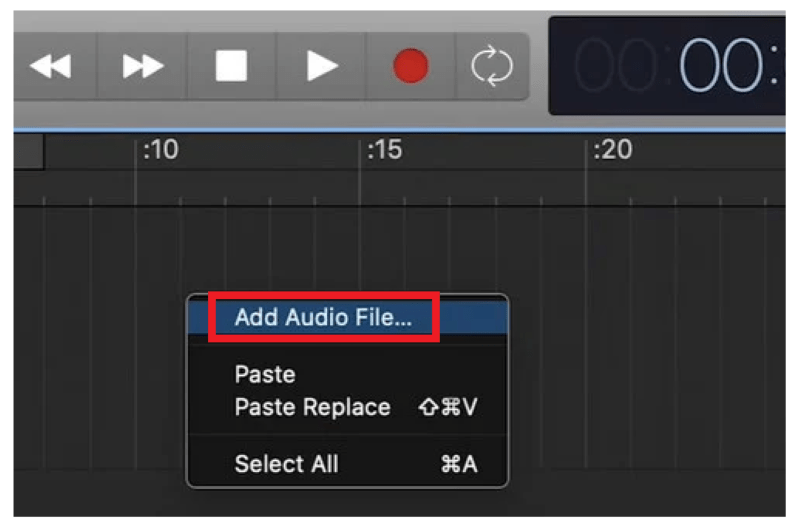
Right-click on one of the soundtracks on GarageBand, then choose "Add Audio File...". Find and choose the downloaded Apple Music audio in the folders, and click "Open". Now, you can finally add and edit Apple Music on GarageBand with ease.
By following these straightforward steps, you've successfully added Apple Music to GarageBand on a Mac or iPhone. Whether you're a seasoned musician or just starting your journey, this integration of Apple Music and GarageBand can significantly elevate your creations. Remember, every great song starts with a single note. Don't forget to download TuneCable iMusic Converter to enjoy and create your music.
 What's next? Download TuneCable iMusic Converter now!

Download Apple Music, iTunes Music and Audible audiobooks with lossless quality kept.

Download music tracks from Spotify, Amazon Music, Apple music, YouTube Music, TIDAL, Deezer, etc.

Recover lost 1000+ types of files from disks, partitions, hard drives, SD cards, and other external devices.